
[:en]
Today we will see together how to prepare the focaccia with the use of mother yeast. If you want to start making your own mother yeast, see our recipe!
Our one, for example, is usually refreshed with a little wholemeal flour, which will already give to it a light brown color and a wholemeal taste to our focaccia or bread. Check how we refresh our mother yeast!
But let’s start with the recipe and see immediately what the ingredients are: 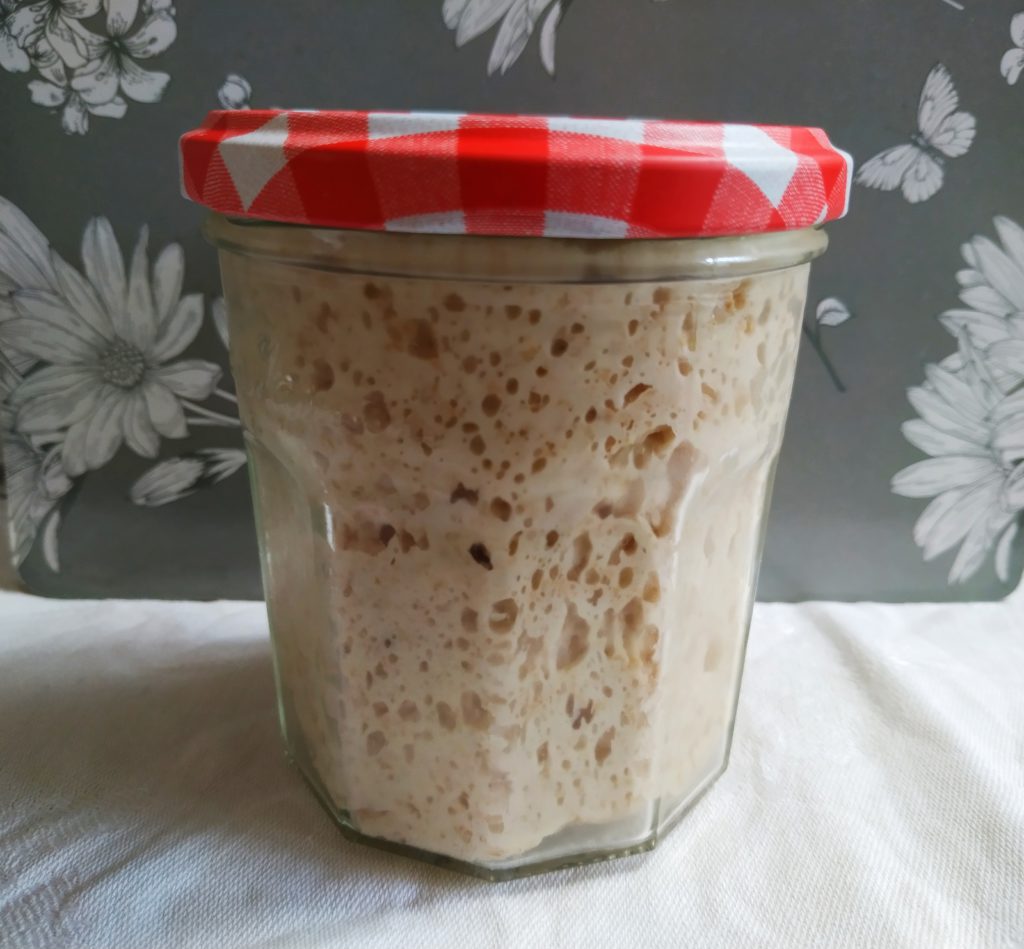
- 100 g of refreshed mother yeast
- 120 ml. of water at room temperature
- 10 g sugar or honey
- 400 g flour (the one you prefer; I used 200 manitoba, 200 semi-wholemeal)
- 10 g salt
- 160 ml. of warm water
- Maldon salt to taste
- rosemary
- extra virgin olive oil
Method:
First, after you refreshed your mother yeast, and allowing it to double in volume (this process should take about 2 hours), weigh 100 g. in a bowl and add the 120 ml. of water at room temperature with sugar or honey. Melt the yeast well and let it rest for another 20-30 minutes…

In the meantime, we can take another bowl, pour warm water and dissolve the salt well. Then add the flour (and here you can indulge yourself as you want; I usually use a part of manitoba, semi-wholemeal flour, wholemeal flour and buckwheat).
Now mix the mixture coarsely and let it sit for 20 minutes. This will assist the gluten formation process.
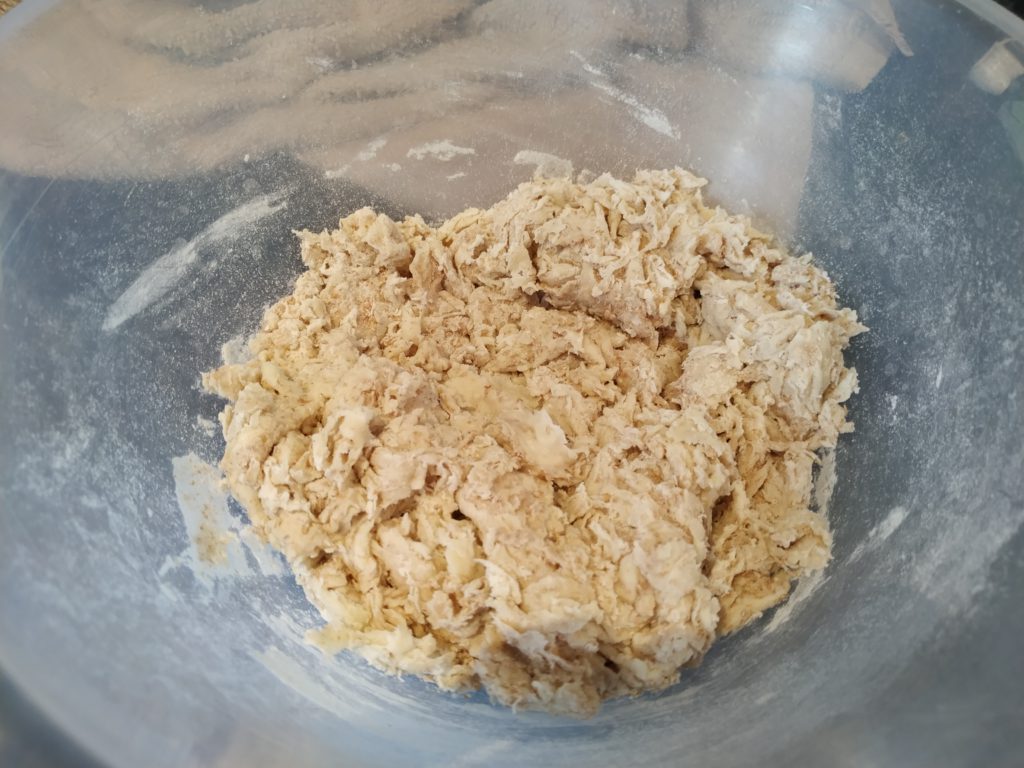
After 20 minutes, we will be ready to make our dough; pour the yeast into the flour and operate your mixing machine (for lovers of old traditions, the procedure can also be done by hand).
Keep mixing your dough for at least 15 minutes, until you get a homogeneous dough, maybe a little sticky. In fact, this is one of the main characteristics of a dough with mother yeast.
Then put your dough in a glass bowl sprinkled with extra virgin olive oil, cover it and let it rest for about 20 minutes…

We are now ready to fold; usually, given the consistency of the dough, I choose whether to make the folds in a bowl or on the counter. If the dough is too soft and difficult to work, I will prefer the folds in the bowl, while if the dough is a little more firm, I will make it on the work surface.
I will then perform a 4 folds, which consists in folding your dough on itself from all 4 sides and putting it back in your oiled bowl for about 20 more minutes.
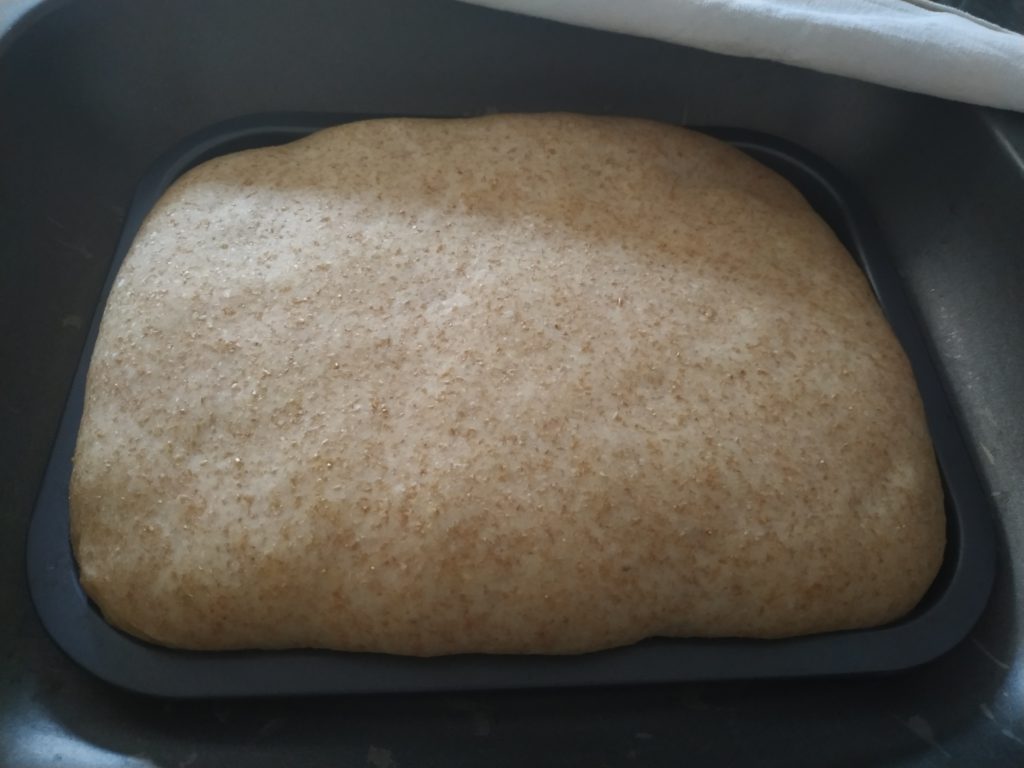
We will make the folds at least 2 more times, and then let it rest for another half hour. At this point we will be ready to put our focaccia in our baking tray; sprinkle it well with extra virgin olive oil and spread it gently…

Now is proving time; this will also depend a lot on the strength of your mother yeast. On this particular occasion, my focaccia took just under 10 hours, but normally needs 12 hours.
You can easily make the dough in the evening and let it proving all night and bake the following morning…
We then preheat the oven to 250 degrees, sprinkle the surface of our focaccia with Maldon salt, chopped rosemary and extra virgin olive oil and bake for 20 minutes bringing the oven to 230 degrees…
Then, probably, depending on the power of your oven, you will have to give another 10 minutes of cooking by lowering the temperature to 200 degrees…
Once out of the oven, place your focaccia on a wire rack so that it does not absorb moisture, and let it cool… If you can! It should be cut cold, but I think no one has ever waited so long to taste it !!!

Take a look also at our recipe of focaccia with figs and parma ham!!! and let us know which one is your favorite by commenting below! We are also waiting for your photos and also follow us on our social networks! See you at the next recipe!
[:it]Oggi vedremo insieme come preparare la focaccia con l’utilizzo del lievito madre. Se volete la ricetta per creare il vostro lievito madre cliccate qui!
Il nostro, per esempio, lo rinfreschiamo anche con un po’ di farina integrale, il che comporterà avere già una base un po’ più scusa del normale. Se volete vedere come rinfreschiamo il nostro lievito madre, cliccate qui!
Ma partiamo con la ricetta e vediamo subito quali sono gli Ingredienti:
- 100 g. di lievito madre rinfrescato
- 120 ml. di acqua a temperatura ambiente
- 10 g. zucchero o miele
- 400 g. farina (quella che preferite io ho usato 200 manitoba, 200 semi-integrale)
- 10 g. sale
- 160 ml. di acqua tiepida
- sale maldon q.b.
- rosmarino
- olio extra vergine di oliva
Procedimento:
Per prima cosa, dopo aver rinfrescato il vostro lievito madre, e averlo lasciato raddoppiare di volume (questo procedimento dovrebbe richiedere circa 2 ore), pesatene 100 g. in una terrina, e aggiungete i 120 ml. di acqua a temperatura ambiente con lo zucchero o il miele.
Sciogliete bene il lievito e lasciatelo riposare per altri 20-30 minuti…
Nel frattempo possiamo prendere un’altra terrina, versare l’acqua tiepida e scioglierci bene il sale. Poi aggiungiamo la farina (e qui potete sbizzarrirvi come piú volete; io di solito uso una parte di manitoba, farina semi-integrale, farina integrale e grano saraceno).
Mescolate ora il composto grossolanamente e lasciate riposare per 20 minuti. Questo aiuterà il procedimento di formazione del glutine.
Una volta trascorso il tempo dovuto, saremo pronti ad impastare; versate quindi il lievito nella farina e azionate la vostra planetaria (per gli amanti delle vecchie tradizioni, il procedimento si può effettuare anche a mano).
Lavorate il vostro impasto per almeno 15 minuti, finché non otterrete un impasto omogeneo, seppure un pochino appiccicoso. Infatti questa é una delle caratteristiche principali di un impasto con il lievito madre.
Mettete quindi il vostro impasto in una bowl di vetro cosparsa di olio extra vergine di oliva, copritelo e lasciatelo riposare per circa 20 minuti…
Siamo arrivati ora al momento delle pieghe; di solito, considerata la consistenza del mio impasto, scelgo se eseguire le pieghe in ciotola o sul banco. Se l’impasto è troppo morbido e difficile da lavorare, prediligerò le pieghe in ciotola, mentre se l’impasto è un po’ più fermo, eseguirò le mie pieghe sul piano da lavoro.
Eseguirò quindi una piega a 4, che consiste nel ripiegare il vostro impasto su se stesso da tutti e 4 i lati e rimetterlo nella vostra terrina oliata per altri 20 minuti circa. Faremo le pieghe almeno altre 2 volte, e lasceremo riposare poi ancora per mezz’ora.
A questo punto saremo pronti per mettere la nostra focaccia in teglia; cospargiamola bene di olio extravergine e stendiamola dolcemente…
E’ arrivato il momento di lasciarla lievitare; il tempo di lievitazione dipenderà molto anche dalla forza del vostro lievito madre. In questa particolare occasione la mia focaccia ha impiegato poco meno di 10 ore, ma normalmente necessita anche di 12 ore.
Si puó tranquillamente impastare la sera e lasciare lievitare tutta la notte e infornare la mattina seguente…
Preriscaldiamo quindi il forno a 250 gradi, cospargiamo la superficie della nostra focaccia con sale maldon, rosmarino tritato e olio extravergine di oliva e inforniamo per 20 minuti portando il forno a 230 gradi…
Poi probabilmente, a seconda della potenza del vostro forno, dovremo dare altri 10 minuti di cottura abbassando la temperatura a 200 gradi…
Una volta sfornata, adagiate la vostra focaccia su una griglia per non farle assorbire l’umidità, e lasciatela raffreddare… se ci riuscite!!! Andrebbe tagliata da fredda, ma credo che mai nessuno abbia aspettato così tanto tempo per assaggiarla!!!
Date un’occhiata anche alla nostra ricetta della focaccia con fichi e prosciutto!!! e fateci sapere qual è la vostra preferita commentando qui sotto! Aspettiamo anche le vostre foto e seguiteci anche sui nostri social networks!
Ci vediamo alla prossima ricetta!
[:]